The 1861 Corset is Started!
The 1861 Corset is Started!
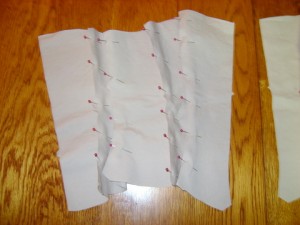
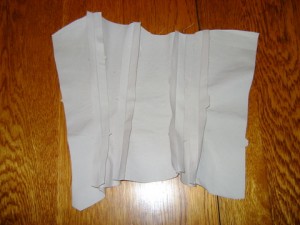
On Sunday, my sister left for Seattle early in the morning, so I had some free time to spend on working on the 1861 corset. (I had blogged about this in November.) I am using duck canvas in a natural color, although it looks white in this pictures. The style is quite different than the 16th century corsets; those were intended to give the upper body a conical shape, with a smaller waist, although the corset was not intended to make the waist smaller. Rather, fashion at that time used larger skirts and dramatic shoulder treatments to make the body appear to have a more pronounced waist. The 19th century corset is the beginning of the trend to minimize the waist, while offering support for the bust, and also fits from bust to several inches below the waist, which allows for a better weight distribution for heavy skirts. To give the garment a smaller waist circumference without sacrificing hip and bust circumference, and without wrinkling, each half of the corset has 5 panels, each of which are slightly curved. Here are the five panels pinned together, prior to sewing:  And after sewing. I used a 5/8 inch seam allowance. Because the corset is not lined, it calls for a flat felled seam. After sewing the seams, I pressed them open.
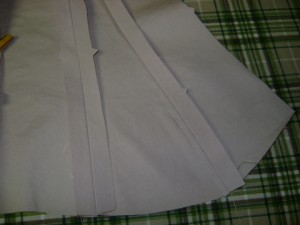
  I then trimmed one side of the excess fabric, and pressed the untrimmed side over the trimmed side, using a 1/4" seam allowance folded under.
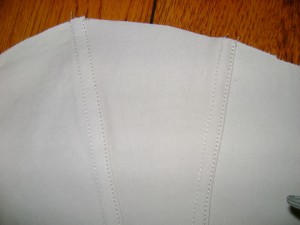
  Then, the folded over part is sewn back onto the garment, creating a flat and smooth seam with no visible untrimmed edges.
  Both sides are completed as far as I can get them; I need to order a 12" busk that will be sewn to both front seams to connect the two sides together; the busk clasps together using steel pegs and loops, and provides the opening to get in and out of the corset. The back seams will be finished, and then gromments will be punched into both sides for lacing. The laces are left in the garment, loosened, and when the corset is put on using the busk, the laces are then tightened to the desired size. In addition to the busk, I also need to attached boning; it is added using casing which is sewn to the garment, creating a pocket for the boning. In the past, I have used plastic boning; I am considering ordering steel boning for this one, as it lays flatter, and I am curious to see how the garment will lay with the thinner steel. For the gown, I am still looking at fabrics, although this wine cotton pique looks very promising:
  The darker fabric definitely appeals to me much more than lighter colored fabrics, and I think it would look snazzy with a light colored trim, perhaps a dove grey. Because we all know this little project is all about being snazzy. : ) If you've made it this far, and are interested in signing up for email notifications when I post new fascinating and not to be missed posts, click the button at the top of the right column. I've not tested it yet, so bear with me while I get the bugs worked out. : )