
The Black Tutu
The Black Tutu
Thursday, August 11, 2011 - 15:06
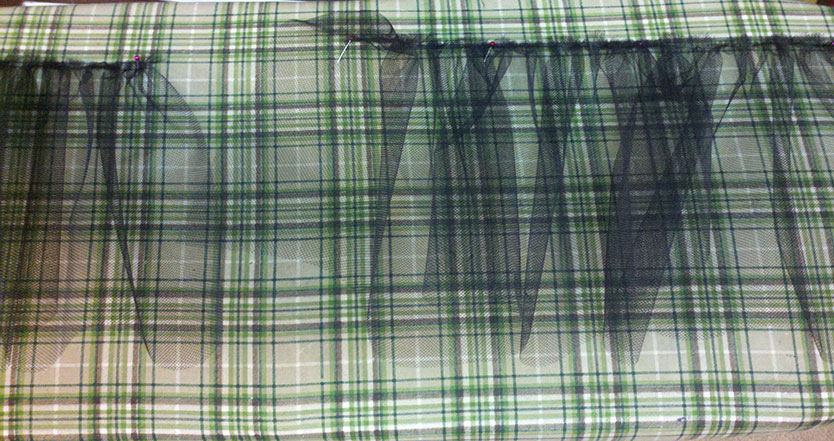
I have no idea what I was thinking. This is so far out of my normal set of sewing skills. Maybe that was part of the allure. I don't even know what would make a rational person say, hey, I'll make a tutu! I have nowhere to wear it to, and nowhere to even store it, but I need a tutu! NEED! It started the way most of my project ideas started... a glimpse of an image or word that catches my eye, and leads me on a path of research. Sometimes I end up where I started, sometimes I end up in a different century altogether. This time, I was getting the costuming ready for the Labyrinth of Jareth Masquerade ball, and I was looking at unusual makeup ideas. I saw an image that had black vinework on a woman's temple that continued into a fascinator made with wire vinework and feathers. The fascinator let me to looking into headpieces, then tiaras; the tiaras led me to images of the ballerinas, who frequently perform with tiaras; that led me to the white swan headpiece from Swan Lake, which led me to look at the tutus, and a few hours and a few glasses of wine later, I was ordering a tutu construction manual and patterns. There are different types of tutus; there are classical pancake tutus, some of which the most well known ones are the tutus worn by Odette and Odile, the black and white swans from swan lake; also the Firebird tutu, Sleeping Beauty, and the Sugar Plum fairy and Clara's tutu during Act II and her pas de deux with the prince (swoon!!!). There are also romantic tutus, which are longer, and flowier; notably Giselle and La Sylphide. I had no interest in the romantic tutus; I wanted a classical pancake tutu. It turns out they aren't quite as simple as one would think to construct. Not that one normally thinks of things like this. The more I read about how complicated and detailed the construction process was, the more hooked I was. Armed with fabric types and requirements, I hit my favorite Joanns. I wanted to make the white swan tutu, so I could make the headpiece to go with it. I found the panty material, powernet, in white; I found the appropriate type of net in white, but I could not, for the life of me, find a great fabric for the bodice in white. Frustrated, I stopped to regroup. Suddenly, it hit me... for every fabric I had found in white, they had bolts in black. If I could just find a suitable fashion fabric in black, I could just do the black swan tutu first, THEN I'd do the white swan!!! That's when I began to question my sanity. One tutu, sure. Two?? That is crazy territory. Again, I have no where to wear a tutu. I exchanged the white fabrics I had picked out for black fabrics, and picked up some black velvet for the bodice and basque.

The fabrics for the black tutu
I started with the basque, since that seemed to be one of the fiddlier parts. The basque is the piece that fits above the top of the tulle skirt; from mid-hip up to the waist. The purpose of the basque is to provide a well fitted, separate piece that connects the tutu to the bodice without allowing for any unnecessary movement while the dancer is being partnered. Since it is custom fit to each dancer, there is no pattern for it. Instead, a rectangle is drawn on a piece of pattern paper that is as wide as half the hip measurement of the dancer, and is approximately 4-5" tall. The height of the rectangle is measured on the dancer to see where the top of the tutu skirt should sit on the hip; ideally, it will sit mid-hip, not too high or too low. The rectangle is cut out, and one side is marked fold, meaning that the fabric that will be cut out will be folded in half (since the pattern is made to fit half the dancer's hip measurement.) Then, the waist measurement of the dancer is taken, and divided in half. This is the amount that needs to be removed from the top of the basque pattern. The half measurement is divided into 5; and four evenly spaced darts are made in that measurement. The 5th measurement is taken half from the fold seam. The darts are folded and taped into place, creating a curved pattern. That is traced onto a clean sheet of pattern paper, 3 inches added at the band end for the fastenings, and the pattern is complete. For stability, the pattern is cut out of both the fashion fabric and in interlining fabric; the two pieces are serged together at the edges, and treated as one piece thereafter.

The basque piece, after serging the interlining to the fashion fabric.
1" elastic is sewn to the top of the basque to form the waistband, which is fitted at the dancer's natural waist. The basque is done for the time being, and set aside. Next, I opted to tackle the bodice; it seemed to be easier than the skirt, and I was familiar with the construction. I made a few sizing adjustments to the pattern, and cut out the fashion fabric and interlining. Each piece is individually serged together, as the basque was. This is done for several reasons; it keeps the pieces together to avoid wrinkling during construction; it provides stability to the fabric to lengthen the lifetime of the garment, and it also finishes the edges, as a professional tutu is not lined. The seams are left visible on the inside, so that the garment can later be adjusted to fit different dancers as needed.

Serging the bodice panels
Once all of the pieces are serged, they are sewn together to form the bodice. The only interesting part of the construction is that the two side front pieces are cut on a bias, and are eased onto the front pieces; this creates a better fit on the dancer. To help hold the shape of the bodice, and to support the dancer, steel boning is used at each of the seams; I sewed down the seam allowances to form the boning channels.

The bodice panels sewn together.
There are several methods to finish the top and bottom edges of the bodice, and the bottom edge of the basque; I opted for the preferred methods of professional tutu makers. I used 1/8" cording, and cut satin fabric in 2" bias strips; I serged one edge of each of the strips, placed the cording down the center of the strips, folded the raw edge over to not cover the serged edge, and used a zipper foot to sew as close to the cording as I could get. Voila, corded bias tape made in matching fabric. ; ) The bias tape is then pinned above the edge meant to be finished, with the cord opposite the serged edge of the garment; the bias tape is then sewn on to the edge of the garment. For the bottom hem of the bodice, then, the serged edge of the tape overlapped the serged edge of the bodice hem; the raw edge of the bias tape layed under the serged edge of the tape, and the corded part of the tape was above the hemline. After sewing it to the bodice as close to the cord as possible, the bias was then folded under to the underside of the gament, with the corded edge now at the bottom of the hem, creating a beautiful edge, and providing stability to the bodice. The serged edge of the tape was now on top on the underside of the bodice, and I tacked it down to the bodice, enclosing both the raw tape edge and the bodice hem, creating a neat look to the inside of the garment. For tutus that are intended to be altered in the future, the corded bias tape is added in sections, so that to adjusting the chest and waist size of the bodice will not entail undoing and redoing ALL of the bias tape, but just sections.

The bodice and basque with the corded bias tape attached.
It was time to move on. I had some concerns about the panty, as it was to be made from the powernet; powernet must have been created by aliens. It is stretchy in every direction, it is nearly impossible to cut without stretching it out of place; it is more mesh-like than not, so I wasn't sure if I should do a single layer or two to provide more coverage. Not emotionally ready to deal with that, I decided to start cutting the tulle. Professional pancake tutus are made of between 9 and 11 rows of gathered tulle in graduated widths. The short widths at the bottom help prop up the heavier upper widths, and give the tutu its shape and structure. Additional rows are often added to the panty under the main frills, to give more coverage. These are called, I kid you not, "butt ruffles". I spent more time chuckling over that than I should have. I think the instruction manual should have an lol after each mention of butt ruffles. Butt ruffles. lol!!! Ah... moving on. There are charts to determine how much of each width of tulle to cut. I made a post it note for each layer, marked with the layer number, the number of pieces, and the width. Then, I got out my self-healing cutting mat, a rotary cutter, and got to work. Cutting. It was not the most fun process ever. I did take the recommendation of the manual to do it all in one go, to avoid miscuts or confusion. I folded the 12 yards of tulle in half, and in half again, and started cutting. And cutting. And cutting.

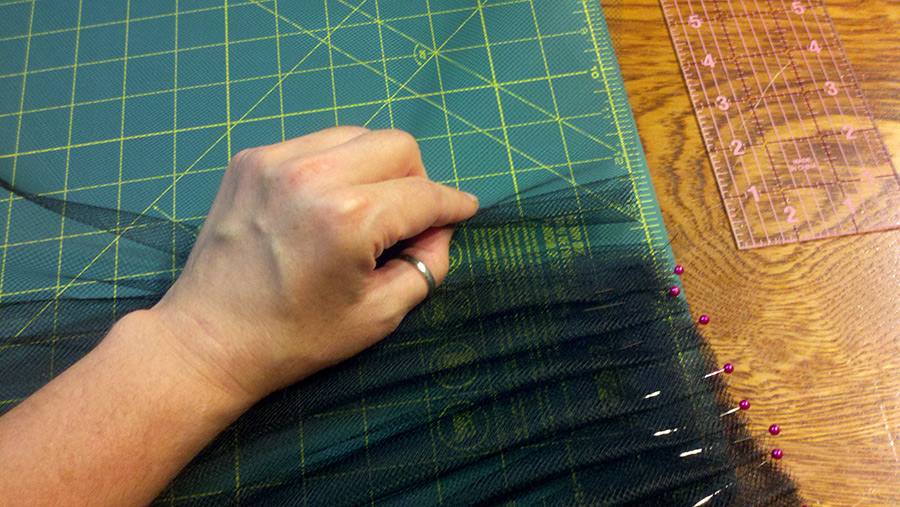
The tulle layers, cut and pinned by layers.
This was when I began to get the understanding that my house just might be too small for this project. You see, the tulle edges catch on EVERYTHING. Each other, thread, other fabrics... oy. I need the ironing board clear to iron them; I needed the table clear as a workspace, where was I going to put all of these piles?? I finally settled for the piano... in rows across the top, across the music holder, and over the keys. As long as Jesse stayed away from them, I would be fine. ; ) Working with one layer at a time, I ran them through my ruffler attachment on my sewing machine to gather them. The pieces for each layer are not sewn together during this process; they are left separate, so that when they are gathered to fit the panty, the gathering will be more even. More on this later.

Ruffling the smallest widths of frills first...

Ruffling a larger frill piece.
I ruffled 64.5 yards of tulle. Really, it wasn't bad once I got going. And drinking wine while mindlessly ruffling helped. A lot. ; ) The next step was to steam and iron the layers into some sort of submission, so that attaching them to the panty would be easier. Haha, easier. THAT is someone's idea of a joke. And not a very good one.
Ironing the frills.
Each frill section is pinned to the ironing board, and the bottom hem is carefully pulled down to pull the frill into nice, tight ruffles, which are then carefully ironed with steam. Using a steamer is preferred, as an iron can smash the tulle, "deadening" it, so that that finished tutu is flat and doesn't have the right body or movement. With all of the frills cut, ruffled, and steamed, it was time to face the inevitable, otherwise known as the powernet panty. I did end up cutting two layers, and serging them together. It did make it less of a nightmare than handling one flimsy layer.

One half of the panty, pinned and ready to serge.
The two panty halves are sewn together at the front seam; the seam allowances are tacked down to the outside of the panty using a zigzag stitch. In tutu construction, most of the seams are sewn opposite of normal apparel construction; the seams on are on the inside, and the seam allowances on the outside. This is to avoid irritating the dancer with unnecessary edges on the inside of the panty as she dances. The panty is marked with lines for each layer of frill; each layer is subdivided by vertical lines, determined by how many sections there are for each layer of frill. Top layers have 6 or 7 pieces; middle layers 5 or 5; and the bottom layers only 4 sections. Once marked, the frills can then be pinned on, then sewn on using a zigzag stitch. I took the advice of a few professional tutu makers, and sew the longer, top 3 layers on with the seam allowance facing up; this caused the frills to hand down from the hip. The remaining 6 layers of frill would be sewn on with the seam allowances down, causing the frill to push straight up, pushing the top layers up, and creating the beautiful classical pancake shape. Also, to ensure the tutu had the correct shape, I opted to use a metal hoop on the 7th layer of frill. There are usually not highly desired for tutus that are used in partnered dances, because the man has to work around this extra force pushing at him. But, since I'm reasonably sure I don't be doing any pas de deuxs, I thought I would do the hoop, for practice. And to make sure my tutu wasn't a droopy pancake. To accomodate the hoop, I had cut hoop casings, 3" wide strips of tulle, one for each piece in layer 7. I sewed the top and bottom parts of the hoop casing to each piece, one third of the way in from the outside edge.
The hoop casing pinned to a piece of layer 7 net.
I'd like to point out here that the net is barely visible when handled by single layers. Luckily, only 6 pieces had to be pinned and sewn. I started with the longest layers first, attaching each one to the panty; first pinning it, then sewing it. However, the topmost layer isn't sewn on until last; so I first pinned and sewed layer 8, then layer 7, the hoop layer. Once I started to pin on the first layer, however, I realized that the ruffling hadn't pulled in the length of net enough to fit the panty. I basted each piece along the ruffling seam, and pulled the thread to created a tighter gather, so all pieces would fit at each layer. While I think the ruffling is a personal preference, I'm not convinced that it wouldn't be easier to skip that step, and just gather each piece, and relying on the individual pieces and vertical section marks on the panty to keep the entire tutu evenly ruffled.

Row 8 is facing up, row 7 is facing down.
Row 8, the first row to go on, was a nightmare. The powernet kept stretching and moving, and curling under at the top edge. I ended up undoing the entire first layer, then resewing it on more carefully. The more layers that went on gave support to the powernet, though, so it did get easier, in that sense. However, a new challenge awaited me... as I got more frills attached to the panty, the thing grew more and more unwieldy. It was at this point that I began to think that all of the women giving me advice and telling me how addicting this was were all batshit crazy. This, my friends, was NOT fun. Or addicting.

Rows 8 - 3 attached.
It was at this point that I realized this thing was taking over my house, and I might never be able to eat at my dining room table again. I also realized how much effort it would take to shove this whole beast through the sewing machine; holding the attached frill rows down, keeping the panty from bunching, and pulling pins out as I went. It would have helped to have had 4 more hands during this part of the process.

At this point, the process was more like alligator wrangling than making a garment.

Putting the bottom layer of frill on the panty.
After this layer of frill, I decided to try a suggestion I had previous scoffed at - moving the sewing machine to the edge of the table, and allowing the bulk of the frills to fall off the side of the table, instead of being buried in them. To finishes the layers, the topmost layer had to be pleated and sewn on. Since I wanted to try all of the proper techniques, I decided to hand pleat this row. Double pleated. Of course. ; )

Hand pleating the top frill layer. The edge of the net is rolled twice to give it a starting edge; then two inches out, the net is folded and rolled once towards the edge, forming a one inch pleat one inch away from the edge.
That pleat is then picked up, along with the net on the left side of it...

...and folded over, overlapping the prior pleat halfway. This way, all of the pleats are double rolled, and face in the same direction around the circumference of the tutu.

The double pleat pinned in place. Each pleat is pinned until the entire length of the layer is pleated (for this layer, I used 10 1/2 yards of net). I didn't count how many pleats, but I used every single pin in my tomato pin cushion, and I had to break into the spare tomato!

The top layer, completely double pleated.
I pinned the top layer carefully on to the already massive beast, being careful to make sure the layer was level with the top edge of the panty. Once the layer was sewn on, I folded the top edge of the panty over the edge of the frill seam allowance, and sewed it down. The basque would get attached to the panty at this same seam line, and the ruffle seam allowance would be horribly scratchy on the dance if this step wasn't done. Once that was sewn down, I pinned on the basque. This, my friends, was the moment of truth. I tried it on, hoping the frill wasn't a lopsided mess, or, worse, have a duck butt. Apparently, in the tutu making world, duck butt occurs when either the basque isn't patterned exactly right, or if the dance has a bit of a sway back that isn't compensated for in the pattern drafting. Either way, it is BAD news. And swaybacks are NOT cool in the ballet world, either. I think you should all know that.

The basque pinned to the tutu.

I love how nice the double pleating looks!
It was, incidentally, at this point that I stopped muttering "batshit crazy" to myself, and started to really enjoy the process. The hand pleating was actually very relaxing and fun. I never thought I would say that about something so tedious. But it was so instantly rewarding, and so much easier than I anticipated. This is also when I started thinking about the next tutu. : ) I attached the basque to the panty by machine, stitching "in the ditch", or in the very narrow space between the basque cording and the velvet. The stitches are all invisible. In my race to finish the tutu, I sadly didn't take pictures of the finish work. With the basque attached to the tutu, I had to them steam each layer of frill to get it to lay nicely and flatly. I laid the bulk of the tutu upside down on my table, and lined up the ironing board at the edge of the table, so I could fit roughly 1/6 of the tutu on the ironing board. Starting with the longest layer and working my way to the shortest layer, I steamed the layers flat, rotating the tutu after each section. After finishing steaming, the tutu gets flipped over, and the tedious process started again. A third flip, and more steaming, and the tutus now looked like a classical pancake tutu! Yay!! To help it keep it shape, tacking stitches are used all around the tutu, in several layers. First layers 6, 7, and 8 are tacked together, using individual knotted 1 1/2" stitches every 4 - 5" around the tutu. The tack stitch is hidden by the layers above it. Then, layers 3, 4, 5, and 6 are tacked together; by using the top layer of the previously tacked layer, the entire skirt is effectively tacked together. Finally the bottom layers are tacked to layer 3, then layer 1 is tacked carefully to layer 2; the taking stitches on the top layer are hidden in the middle of the double pleats, so they do not show. With the basque on the panty, I then sewed the bodice to the basque. matching up the front and sides at the waistline. I did have to handstitch this, as it was SO not going to fit through the machine at this point. I did opt to not do the elastic stays to attach the front center of the basque to the bodice, at the advice of the artistic director at my ballet studio; she felt it didn't serve a big enough purpose to make it worthwhile, and she preferred the bodice to just be fully tacked down. Since that was easier, I opted to take her advice. With the tutu now in one piece, I cut elastic straps for the shoulder, a nude powernet inlay for the top of the bodice, and sewed that all on. Hooks and bars were added to the back, and viola, that was it! After spending so much time wrestling with the skirt, the finish work, which normally seems to take forever, when very quickly. And that, my friends, is how a tutu is constructed. It took me five weeks from start to finish; but the learning curve was steep, and I had to seek outside advice at several points along the way. The next one will go much quicker, and I have learned so much about fabrics, construction, and movement. This has been absolutely fascinating. AND, I now have a super cool tutu to wear. Woot!

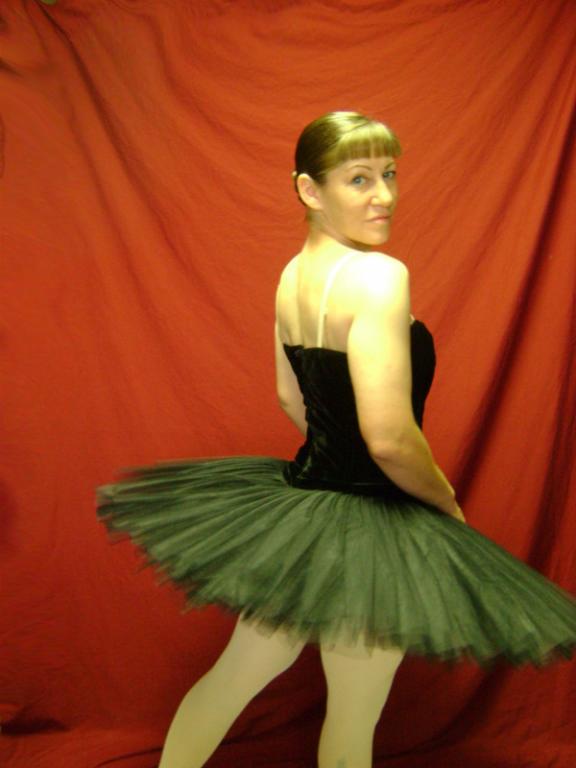
The fit of the bodice is perfect, I am still astounded by that!
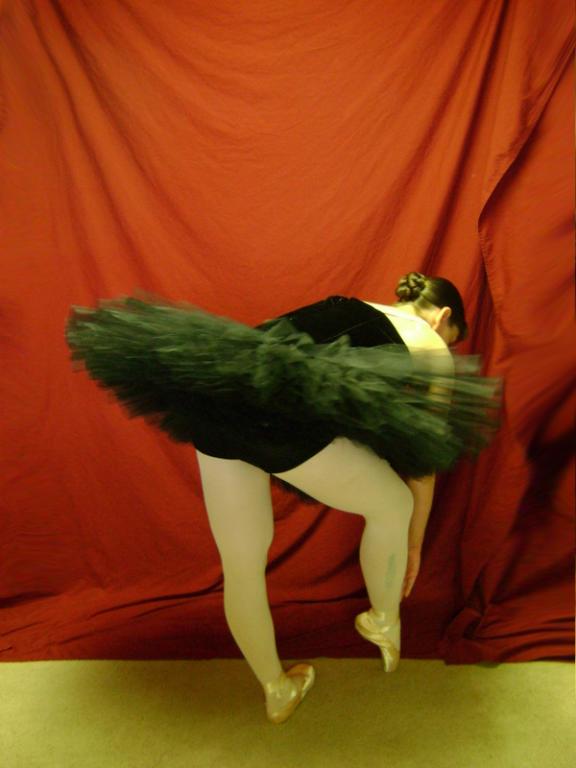
And a gratuitous butt shot, showing the graduated layers of tulle.
Phew! That was a LOT of work!! Let's hope the next one goes faster. ; )
Comments